
Learn to Sign Numbers in ASL from 0 to 100
When you start learning asl numbers, you use special handshapes and palm directions for each number. These asl numbers help you talk about age, phone numbers, and even prices. You open up more chances to connect with others when you know how to sign numbers. Mastering asl numbers gives you a strong start in American Sign Language.
Key Takeaways
- Always keep your palm facing out when you sign numbers. This helps your signs stay clear and easy to see.
- Use the right handshapes and moves like flicks, twists, and changes. These help you sign numbers from 0 to 100 the right way.
- Practice numbers in small groups. Use mirrors, videos, or flashcards to get better and not make mistakes.
- Put tens and ones together smoothly when you sign numbers over 20. Remember special signs like the 'bunny hop' for double numbers.
- Use facial expressions and look at people’s eyes when you sign. This helps others understand your numbers better.
ASL Numbers 0-10
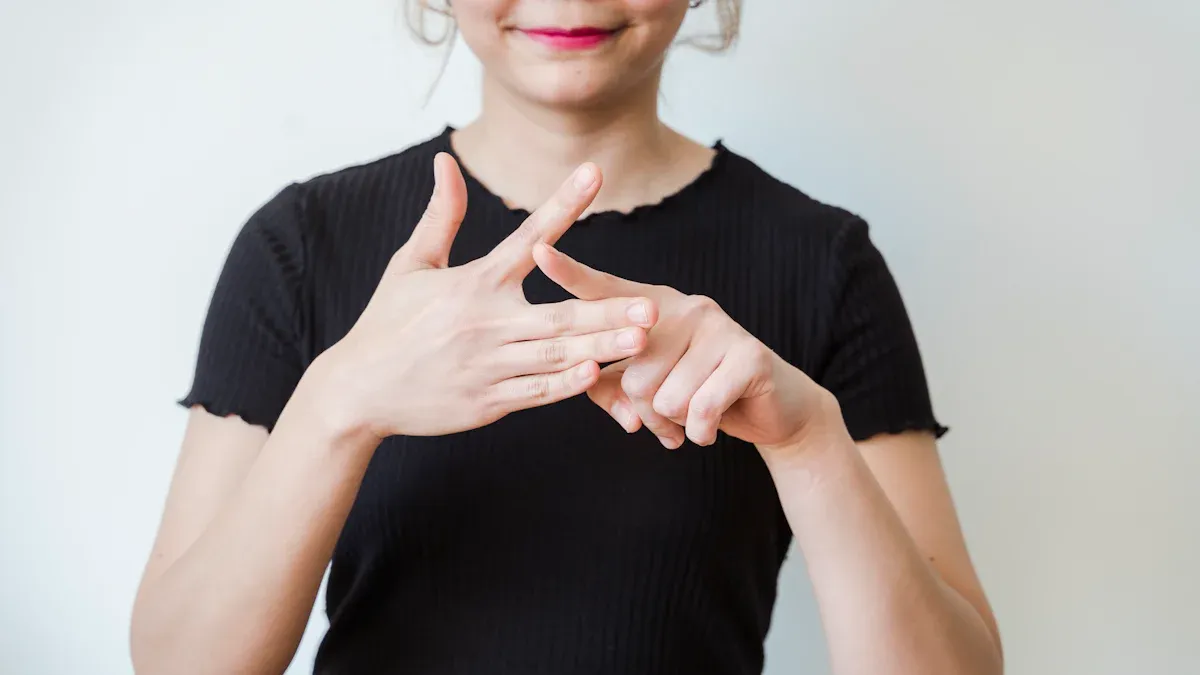
Learning to sign numbers from 0 to 10 in ASL gives you a strong foundation. You use these numbers every day, so getting them right helps you feel more confident. Before you start, let’s talk about the sign for “number” in ASL. To sign “number,” touch the tips of your thumb and index finger together on one hand, then do the same with the other hand, and tap the tips together twice. This sign comes in handy when you want to ask, “What’s your number?” or “How do you sign this number?”
0-5
You sign asl numbers 0 through 5 using just one hand. Each number has its own handshape, but the palm always faces outward, toward the person you’re talking to. This palm orientation matters a lot. If you turn your palm the wrong way, the number can look like something else. For example, when you sign the number 3, you hold up your thumb, index, and middle fingers with your palm facing out. This makes the number clear and easy to see.
Here’s a quick guide to the handshapes:
| Number | Handshape Description |
|---|---|
| 0 | All fingertips touch the thumb, making an “O” shape |
| 1 | Index finger up, other fingers closed |
| 2 | Index and middle fingers up, others closed |
| 3 | Thumb, index, and middle fingers up |
| 4 | All fingers except thumb up |
| 5 | All fingers spread out |
Tip: Keep your arm relaxed and close to your body. Don’t bounce your hand or push it out too far.
Many beginners make the same mistakes when signing asl numbers 0-5. Watch out for these:
- Turning your palm inward instead of outward.
- Holding your arm stiff or too far from your body.
- Using handshapes that look like letters instead of numbers.
- Forgetting to warm up your hands, which can make signing harder.
- Moving your hand too much, making the sign unclear.
Practice each number slowly. Look in a mirror to check your palm direction and handshape. If you get stuck, try watching a video or asking someone who knows ASL.
6-10
Numbers 6 through 10 use different handshapes, but you still use one hand. For 6, touch your thumb to your pinky finger. For 7, touch your thumb to your ring finger. For 8, touch your thumb to your middle finger. For 9, touch your thumb to your index finger. For 10, make a fist and shake it side to side, like you’re giving a thumbs-up.
| Number | Handshape Description |
|---|---|
| 6 | Thumb touches pinky finger, other fingers up |
| 7 | Thumb touches ring finger, other fingers up |
| 8 | Thumb touches middle finger, other fingers up |
| 9 | Thumb touches index finger, other fingers up |
| 10 | Fist with thumb up, shake side to side |
Remember: Your palm still faces outward for these numbers. This helps everyone understand you clearly.
Practice signing these numbers in order and out of order. Try signing your age, your favorite number, or the numbers in your phone number. The more you practice, the easier it gets!
11-20
Learning to sign numbers 11 through 20 in ASL introduces you to some new hand movements. These numbers use special motions that make them stand out from the numbers you already know.
11-15
Numbers 11 to 15 use a unique flicking motion. You start with your palm facing you. Each number has its own finger movement, but they all share this flicking action. Here’s how you do it:
- For 11, make a fist and flick your index finger upward twice.
- For 12, flick both your index and middle fingers upward twice.
- For 13, hold up your index and middle fingers, then bend them toward you twice while your thumb sticks out.
- For 14, hold up four fingers (no thumb) and bend them toward you twice.
- For 15, hold up all five fingers (except the thumb, which sticks out) and bend the four fingers toward you twice.
The flicking motion is what makes these numbers special. Always keep your palm facing yourself. If you flick outward, the sign can mean something else or become unclear.
This flicking movement helps people tell these numbers apart from others. Try to keep the rhythm steady and the motion clear.
16-19
Numbers 16 through 19 use a twisting motion instead of flicking. You start with your palm facing you, then twist your wrist so your palm ends up facing out. Each number uses the handshape for 6, 7, 8, or 9.
- For 16, make the handshape for 6 (thumb touches pinky), palm in, then twist your wrist forward twice.
- For 17, use the handshape for 7 (thumb touches ring finger), twist forward twice.
- For 18, use the handshape for 8 (thumb touches middle finger), twist forward twice.
- For 19, use the handshape for 9 (thumb touches index finger), twist forward twice.
The twist is the key movement here. Start with your palm facing you, then turn it out toward the person watching. This twist shows you are signing a teen number.
You can also sign these numbers by combining the sign for 10 with the single-digit number, but the twist method is more common.
20
Number 20 is quick and simple. Pinch your thumb and index finger together twice, like you are snapping or picking up something small. Your palm faces out. This sign looks a bit like a bird’s beak opening and closing.
Practice the motion for 20 until it feels smooth. This number pops up a lot in daily conversation.
With these new motions, you can now sign all the asl numbers from 11 to 20. Keep practicing the flicks and twists to make your signs clear and easy to understand.
ASL Numbers 21-29
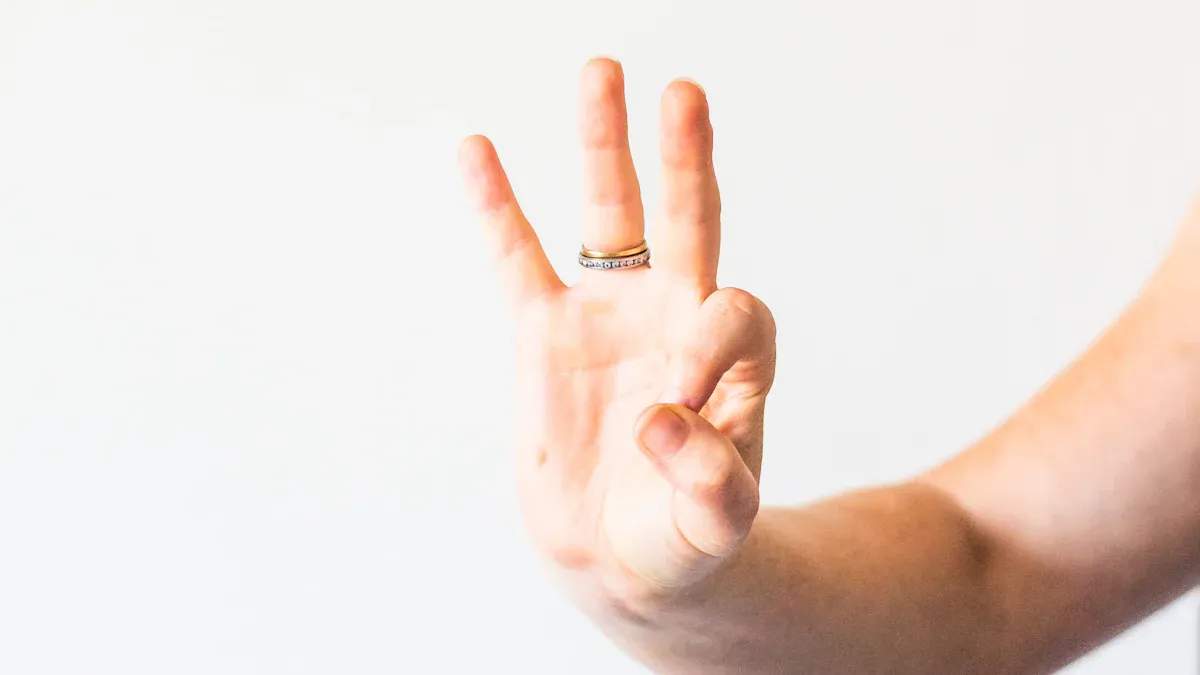
Numbers 21 through 29 in ASL can feel a bit tricky at first. This group uses special handshape combinations and smooth transitions. You will notice that these numbers look different from the ones you have already learned. Don’t worry—once you get the hang of the pattern, you will sign them with confidence.
21
The sign for 21 stands out from the rest. To sign 21, make an “L” shape with your thumb and index finger. Point your palm outward. Then, tap your thumb to the side of your index finger a couple of times. It almost looks like your hand is mimicking a small gun shape. This sign is unique and does not follow the same pattern as the other numbers in this group.
Tip: Keep your hand steady and avoid extra movement. This helps others understand you clearly.
22-29
For numbers 22 through 29, you use a special pattern. Start with the handshape for the number 2 (index and middle fingers extended). Then, transition smoothly into the handshape for the second digit. For example, to sign 27, begin with the “2” handshape, then move into the “7” handshape by bending your ring finger down while extending your thumb and pinky. Your palm should always face outward. Make the transition in front of your chest, keeping the movement fluid and natural.
Here’s a quick table to help you visualize the pattern:
| Number | Start With | Transition To |
|---|---|---|
| 22 | 2 | 2 |
| 23 | 2 | 3 |
| 24 | 2 | 4 |
| 25 | 2 | 5 |
| 26 | 2 | 6 |
| 27 | 2 | 7 |
| 28 | 2 | 8 |
| 29 | 2 | 9 |
You might make some common mistakes when signing these asl numbers. Here are some things to watch out for:
- Moving both fingers together when only one should move.
- Not fully extending your fingers.
- Curling or shaking your fingers too much.
- Turning your palm the wrong way.
- Over-exaggerating the finger bend.
- Forgetting to keep your hand relaxed but firm.
- Not practicing in front of a mirror.
- Leaving out facial expressions or eye contact.
- Rushing through the signs.
Practice isolating your finger movements and keep your palm facing out. Watch fluent signers and try to copy their smooth transitions. With patience and regular practice, you will master these numbers.
30-100
Tens (30, 40, etc.)
When you sign the tens in ASL, you follow a clear pattern. For numbers like 30, 40, 50, and so on, you sign the number for the tens digit and then show a zero. For example, to sign 30, you make the sign for 3 and then move into the sign for 0. This pattern works for 40, 50, 60, 70, 80, and 90 too. Each time, you start with the correct handshape for the tens digit and then finish with the zero handshape.
Tip: Keep your movements smooth and steady. Try not to rush from one number to the next. This helps others understand you better.
Some double numbers, like 33 or 44, use a special movement called the "bunny hop." You sign the single digit, tilt your palm almost flat, and then do a small hop outward. This makes the number stand out and look different from other numbers.
Combining Tens and Ones
For numbers between 31 and 99, you combine the tens sign with the ones sign. Start with the tens digit, then quickly move to the ones digit. For example, to sign 47, you sign 4 and then 7. This pattern stays the same for all numbers in this range. You break down each number into its parts and sign them one after the other.
Here’s a quick table to help you remember:
| Number | How to Sign |
|---|---|
| 36 | Sign 3, then 6 |
| 58 | Sign 5, then 8 |
| 91 | Sign 9, then 1 |
Practice signing random numbers. This will help you get faster and more confident with asl numbers.
100
When you want to sign 100 in ASL, you use a 'C' handshape. Bring your hand near your forehead or temple area. This is the standard way. Some people use a slight variation, still with the 'C' handshape, but they might change the movement or placement a little. Both ways are correct, and you might see both in videos or from different signers.
- Form a 'C' handshape.
- Place it near your forehead or temple.
- You can use the standard movement or the small 'c' variation.
Note: Watch videos or animated gifs to see both versions in action. This helps you pick up the small details.
When you sign larger numbers, break them into parts. Sign the hundreds, then the tens, and finally the ones. This pattern makes even big numbers easy to understand.
You can get good at asl numbers if you learn them in small groups. Practice each group by itself. Use flashcards or play online games to help you remember. Try signing with a friend or look in a mirror to check for mistakes. Always use facial expressions and keep your palm facing out.
If you practice often and get feedback, you will feel more sure of yourself and make fewer mistakes. You will use asl numbers a lot, like when you tell your age or play games.
FAQ
How do I remember the difference between ASL numbers and letters?
Some numbers and letters look similar. You can spot the difference by checking your palm direction and finger position. For example, the number 3 uses your thumb, but the letter W does not. Practice in front of a mirror to help you remember.
Can I use my left hand to sign numbers if I am left-handed?
Yes! If you are left-handed, use your left hand as your dominant signing hand. Just make sure your palm faces the right way. The most important thing is to stay consistent with the hand you use.
What should I do if someone does not understand my number sign?
Stay calm and try again. Slow down your movement and show the number clearly. You can also mouth the number or write it down if needed. Practice helps you get better at being understood.
Are facial expressions important when signing numbers?
Absolutely! Facial expressions help show meaning and make your signs clearer. You do not need to exaggerate, but a friendly face always helps. Try to keep eye contact and smile when you sign.